Framing, Exposure and Light
Your phone is a better camera than the ones that shot plenty of festival films. What it can't do is make decisions. That's your job.
Set the phone up before you frame anything
Clean the lens with a soft cloth; a fingerprint smear is the most common reason beginner footage looks hazy. Switch to airplane mode so calls don't interrupt a take. Clear storage space: 4K at 30 frames per second can eat several gigabytes in ten minutes.
Pick a frame rate and stick with it for the whole film. 24 or 25 frames per second gives the familiar cinema motion; 30 looks more like television. Shoot horizontally unless your film is made for vertical platforms. Free apps such as Blackmagic Camera give you manual control over shutter, ISO, white balance and focus if your built-in camera app doesn't.
Lock exposure and focus
Automatic settings are designed for holiday clips, not scenes. When an actor walks past a window, auto exposure will brighten and darken the image mid-shot. On most phones you can tap and hold on your subject to lock focus and exposure, then slide brightness down slightly. Protect the highlights: a blown-out white sky can't be rescued, while a slightly dark image usually can.
Set white balance manually where possible, or at least keep it consistent across a scene, so skin tones don't drift from warm to cool between shots.
Know your shot types
Every shot is a decision about how close the audience feels to a character. Use this table when writing your shot list.
| Shot | What it shows | Use it to | Phone tip |
|---|---|---|---|
| Establishing / extreme wide | The whole location | Tell us where we are | Use the ultra-wide lens, keep it steady |
| Wide | Full body plus surroundings | Show blocking and movement | Shoot it first as your master |
| Medium | Waist up | Carry most dialogue | Main lens at chest height |
| Close-up | Face fills the frame | Show emotion and reaction | Move closer; avoid digital zoom |
| Extreme close-up | An eye, a hand, an object | Point at a detail that matters | Lock focus, use the 2x lens if you have one |
| Over-the-shoulder | One character past another's shoulder | Connect two people in conversation | Keep the same side for both actors |
| Insert / cutaway | A related object or action | Bridge cuts and hide mistakes | Grab extras at the end of every scene |
Composition that holds attention
Turn on your camera's grid. The rule of thirds suggests placing eyes along the upper third line, not dead centre. Leave "looking room" in front of a character's face. Watch the background: a plant growing out of someone's head will be the only thing your audience notices.
Respect the 180-degree rule. Imagine a line between two characters talking and keep the camera on one side of it. Cross the line and they'll suddenly appear to face the same direction, which confuses viewers in a way they feel but can't explain.
Keep it steady, or move with purpose
Handheld shake reads as nervous energy. Sometimes that's what you want; usually it isn't. A cheap tripod with a phone clamp is worth buying. Without one, brace your elbows against your body, lean on a wall, or rest the phone on books. If you move the camera, move it for a reason: to follow a character, reveal something or build tension.
Light with what's in the room
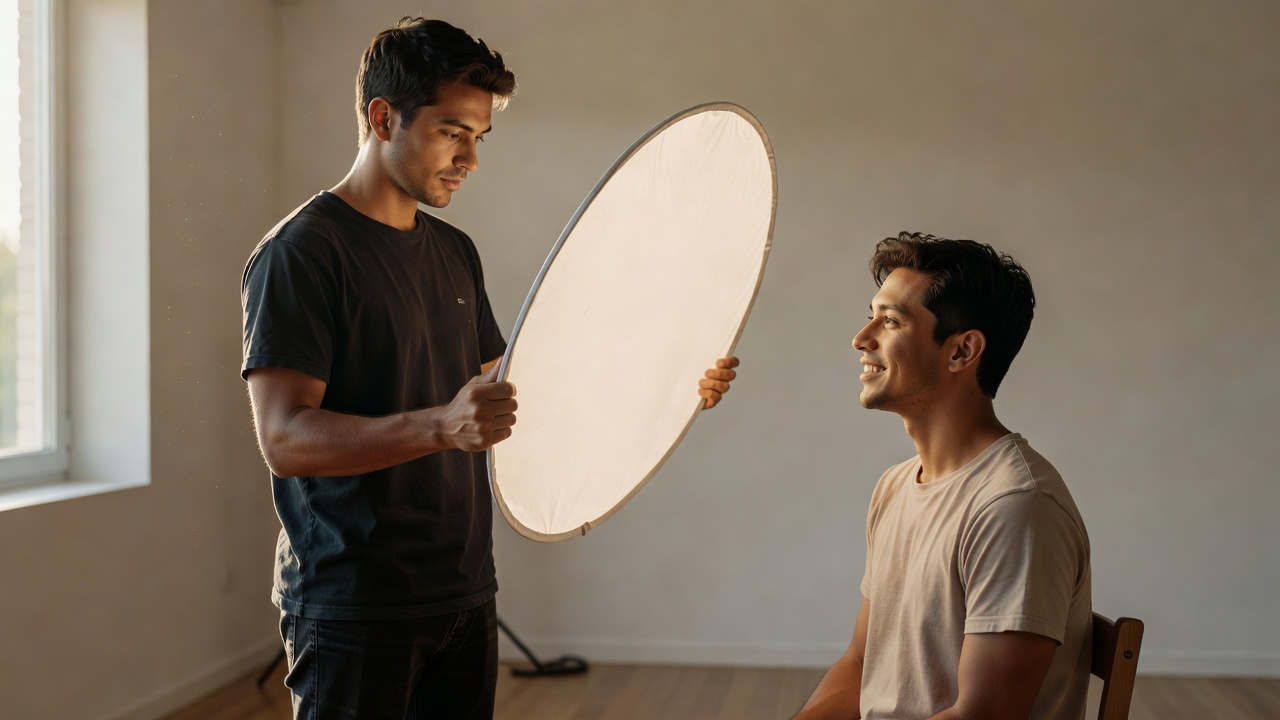
Classic three-point lighting uses a key light, a fill light and a back light. You can build it for free. Put your actor side-on to a large window: that's your key. Hold a white sheet or foam board on the other side to bounce light back: that's your fill. Place a lamp behind them, out of frame, to rim their hair: that's your back light.
Turn off overhead ceiling lights, which create flat, unflattering shadows under the eyes and often clash in colour with daylight. Avoid mixing warm bulbs and cool daylight on the same face unless you mean to. Shoot exteriors in the hour after sunrise or before sunset, when light is soft and directional. Cinematographers like Roger Deakins often talk about lighting a space naturally rather than lighting faces; that's good news for you, because it means motivating light from windows and practical lamps.
- Phone with clean lens and free storage
- Tripod or improvised support
- White sheet or foam board as a bounce
- One or two household lamps
- Power bank for long days
Shoot the same one-minute scene twice: once on auto, once with exposure locked and window light. Compare them. Then learn to capture clean dialogue.